
Part 1: Electrical Insert
The main part of the switch, which gets fitted first. Wire the connectors at the back of the unit to the existing electrical installation and then screw the unit into the back box with flat-head device screws (to enable the frame to sit flush on top of the unit).
The connectors on Berker rotary switches are standard screw fittings. The live connector is labelled ‘L1’.

Berker 1-gang 2-way rotary with 2-way wiring points
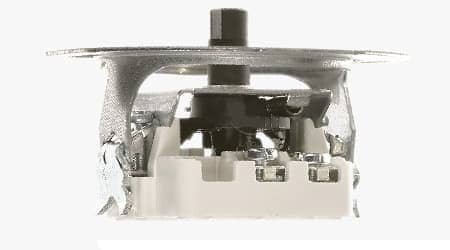
Berker 1-gang rotary insert side view

Fitting the insert to back box (a round Euro box in this case)

Securing the insert to the back box
Part 2: Frame
As usual with European switches, the frame that provides the decorative cover over the insert is not permanently fixed to the unit. Berker has two rotary switch designs which are assembled slightly differently.
For a guide to fitting the ‘1930’ Series switches, please follow the procedure described for the THPG rotary switches here.
The frame of the ‘R.Classic’ rotaries is held in place by a plastic sheath and the screwed-in handle/knob (see part 3).

Correct alignment of the frame over the insert

The frame should sit flush to the wall
Part 3: Front plate
The small round front plate is placed over the round opening in the frame and is secured with the included small hexagonal nut. Please make sure not to over-tighten the nut, which can cause deformation or cracking of the front plate.
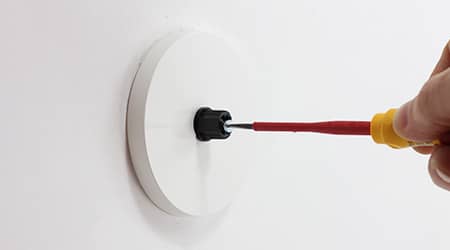
The rotary knob/handle then slides onto the protruding central part of the insert and the included small flat-head screw goes into the centre slot of the handle. The last step of fitting the switch is simply tightening that screw, to secure the handle. Again, please don’t over-tighten anything – Bakelite, Duroplast and particularly Porcelain can crack or splinter easily.
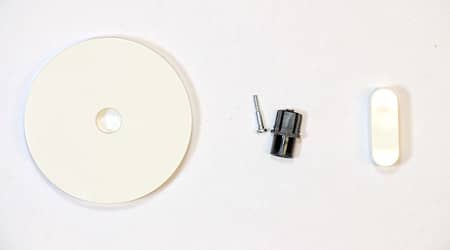
Frame, front plate and rotary handle (R.Classic)

The small sheath is pushed onto the spindle
Securing the front plate with the supplied nut

Correct alignment of the handle cover

The handle cover is pushed onto the sheath/spindle
Removing the switch
When removing Berker rotary switches, you simply need to reverse the fitting process. Pull off the handle cover and loosen the small flat head screw in the centre of the sheath until it comes out. Then pull off the sheath and finally remove the frame.